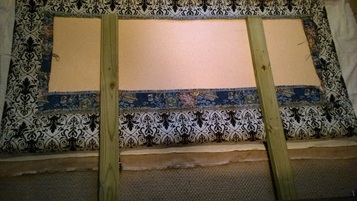
You know how one thing leads to another...well on Black Friday we wandered through Carson's and ended up with a new king-size comforter for $20. But it didn't go with our headboard, which I had made myself about 12 years ago out of a piece of particle board (which had been the mattress support for our kids' bunk beds), a couple scraps of 2 x 4, and some batting.
The headboard had been sort of a blue tapestry, then a black fleur-de-lis kind of pattern, and now I wanted burlap. But burlap looked so...hamster-cage-ish and I panicked a little and texted a friend to see if she thought a burlap headboard would look like a bulletin board, and she suggested nail head trim. Perfect!
So even though I had done this before, I consulted Pinterest and found my inspiration at http://design-aholic.blogspot.com/2009/09/afternoon-headboard.html. Since the headboard was already made and padded--a little too much, actually--all I had to do was use an electric staple gun to fasten on the burlap. If I were going to start this project over, I would either buy longer staples or take off a couple layers of fabric. The two previous fabrics were heavy upholstery and I had some trouble fastening the corners with all those thick layers.
The burlap was only $3.99/yard, but I'd never used nail head trim so I paid a little more for the fast and easy way: three-foot strips of trim and you only have to nail every fifth one. I found it on Amazon. I was NOT about to sit on the floor trying to pound a jillion tacks in a straight line. As it is I had a little trouble keeping a straight line, but only because I'm lazy and was in a hurry. It was actually fun and pretty easy.
I'm pleased with the results. Now I just have to get rid of the S with the vine hanging on the wall (because I imagine spiders rappelling down on me during the night) and re-do the nightstands. And by "redo" I mean "clean off." Maybe some paint...maybe some shelves...we'll see.
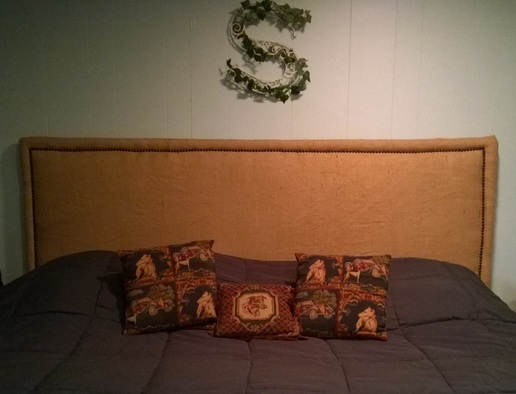
Sheesh, this picture looked so much better in my phone! I'll have to take better ones in the daylight. The comforter is navy and looks nice with the burlap.
 RSS Feed
